Tuesday, October 29, 2013

Game Env Street Corner - Progress shot

In my last post I talked a little about the process of making a tileable texture in zbrush and realized I hadn't uploaded anything about the scene it's meant to be a part of. So, I put together a progress report of the scene as it stands right now. I keep doing a little bit more every night so I'll be sure to update again when I get the scene fully textured and in engine! 


Monday, October 28, 2013

Tileable Stones

I've been working on a game environment and wanted to practice making some tileable textures so I did this Stone walkway. I laid out the bricks in Maya using the grid so that from the get go they overlapped properly on all sides.

I then export this as an obj and bring it into zbrush to subdivide and sculpt the bricks. Zbrush separates each mesh in an obj into separate polygroups which you can then isolate by ctrl + shift + clicking the brick you'd like to work on. I then use the TrimDynamic, PlanarCut, and ClaybuildUp to sculpt out the bricks one by one. 

After that I brought the high poly sculpt back into Maya and transferred it onto a single plane and saved out the resulting images. Took those into photoshop and painted my color map using the transferred maps as a guideline. Then I brought those into Marmoset for the time being so I could show you what it looks like rendered out. 


Sunday, August 4, 2013

Ian McKellen Fully Rendered


My time at CDIA is rapidly coming to a close now and I've begin the hustle to piece together a portfolio from the work I've done while here. This weekend I decided it would be a good time to finally finish up that Ian McKellen sculpt I had been working on a while back, so I sat down with zbrush, found some good tutorials on BPR rendering and went to town. A lot of my work recently has been getting pushed in the cartoonish direction so I wanted to take this opportunity to see what Zbrush has to offer in terms of rendering and realism. There's a myriad of problems with the sculpt but for what it is I would say I'm satisfied with the finished image.

This was entirely sculpted, painted and rendered in Zbrush, with the exception of the button down shirt and suit jacket. I dropped a low poly version of the head into Maya and then built up the shirt around his neck.

When painting the skin I had some help from Zbrush Character Creation: Advanced Digital Sculpting by Scott Spencer. There was a great section about painting/ airbrushing skin and organic surfaces in there that helped me paint his face. The method is similar to the way a traditional air brush artist would paint models and puppets for live action film. 

After I was done painting and noodling away I came to the task of using BPR to render my final image. I'm fairly comfortable at this point with rendering in Maya but I hadn't really used BPR to render anything of substance until now. It took a bit of work and a lot of patience but it was a ton of fun. I relied heavily on this tutorial by Tony Reynolds at Eat 3D where he explains his preferred settings for getting the best Sub Surface Scattering results. 

After I rendered out all of the typical passes I went to work in Photoshop. I spent a lot more time here than I usually do, just tweaking levels and hand painting masks for a bunch of my layers. One great tip I got from that BPR tutorial was to paste the Ambient Occlusion render into a mask on the Ambient Color layer. This makes sure that the saturated colors from the Ambient Color render only show through where the AO render is pure white. After using that technique I then layered on the shadow and SSS layers. Both of which have masks where I hand painted exactly what I wanted to show through and what I didn't want to show. The next great tip gleaned from Eat 3D tutorial was to duplicate the Ambient Color layer, switch the layer to color burn, add a mask to it, and then just airbrush gently into the deep shadows so that the shadows take on a nice rich color. As soon as I did that the image flickered to life, and this is definitely a technique I'll be using in the future. After that, it was onto the spec layer with another painted mask and then onto the lens blur.

Here is an image of my photoshop layers if you're curious at all.

Here is a sheet displaying the different render passes from Zbrush.

Wednesday, July 10, 2013

Captain's Cabin

My night classes at Boston University CDIA are coming to a close in just a couple months now. I'll be revisiting some old work in order to polish them up for my portfolio. I'll be going back to the zbrush sculpt of Ian McKellen, finishing another sculpt I haven't even posted here before, focusing on a new environment I'm designing at the moment, and revisiting Commander Shephard's living quarters on the Normandy. I did this over the winter and never posted anything because it wasn't living up to the potential I thought it had. Really what it needs is just some more time invested in it to add the finer details to the scene, clean up the lighting and add some smaller objects to make it feel more lived in. It's so sterile at the moment that I think you can tell it's not done. This was all done for our interior/environment modeling module. 


Tuesday, July 9, 2013

Porsche Turntable


This is a car model I worked on almost a year ago now, but I finally got around to rendering out a fully lit turntable. Rendered with mental ray and then composited in After Effects. It was a good refresher on render passes and using depth of field. Enjoy!

Tuesday, May 7, 2013

Tree Guardian

Hey everyone, just thought to drop this here. Most of my time right now is being spent on contract work which I can't post anything from right now, but this doodle is just some loose conceptual work for some tree guardians for Loaded. As you know from my last post, I'm working with RatDog Games at the moment on a game called "Loaded". That name is going to change soon and I'll be sure to mention that when it does! Most of the other stuff I've been doing for the game the past week or so involves level layout for the demo we're putting together right now so I thought I'd hold off on sharing more of that stuff until I've got some nice pretty backgrounds to show everyone. 


I also wanted to just take a second to mention someone who's youtube channel has been a lot of fun to watch lately. I've been spending a lot of time drawing and working in photoshop and I'm always looking for something informational but fun to listen to while I work. Kienan Lafferty is an artist that worked as a splash artist for Riot for quite some time and now he's off working on his own comic series. He's got a great series of fun conversational tutorials on his channel so if you're an artist looking for something to listen/watch to you should check them out here http://www.youtube.com/user/KienanLafferty.

Thursday, April 18, 2013

PAX East

I realize this update is super late in the game and I need to vastly improve my art/blog posting abilities but hey, I'm working on it. 

I had the amazing opportunity to be a part of the RatDog Games booth at PAX East a few weeks ago and things went incredibly well. RatDog Games was started a couple years ago by a friend of mine from college and some of his buddies and a while back now they approached me to come on and help out with a new concept that was still in the early stages of development. I'm happy to say that I can show you a few samples of early artwork that I've been doing for the game. The game's working title is "Loaded" and is a 2D side scrolling beat em up RPG. I know, it's a mouthful, but it's a mouthful of awesomeness you gotta admit. As of right now we're planning on publishing to Steam for mac and PC, the Wii U, and PlayStation. We'll be doing a Kickstarter in the next 2 months so keep your eyes open!

A couple things before I give a brief rundown of the few images below. 

1. I'd like to say thank you to everyone that visited the RatDog Games booth at PAX and all the people I met there walking the floor and hanging out after. It was a great experience and it was a ton of fun being surrounded by so many passionate developers and fans. 

2. After being there and meeting so many great people there was one big thing I realized from our conversations that I had been seriously missing out on, Twitter. So, I have now successfully opened and been expertly utilizing a Twitter account. Please feel free to follow me @w_pitzer

The first image is the poster we showed off at PAX East. Again, the title will be evolving as we go.

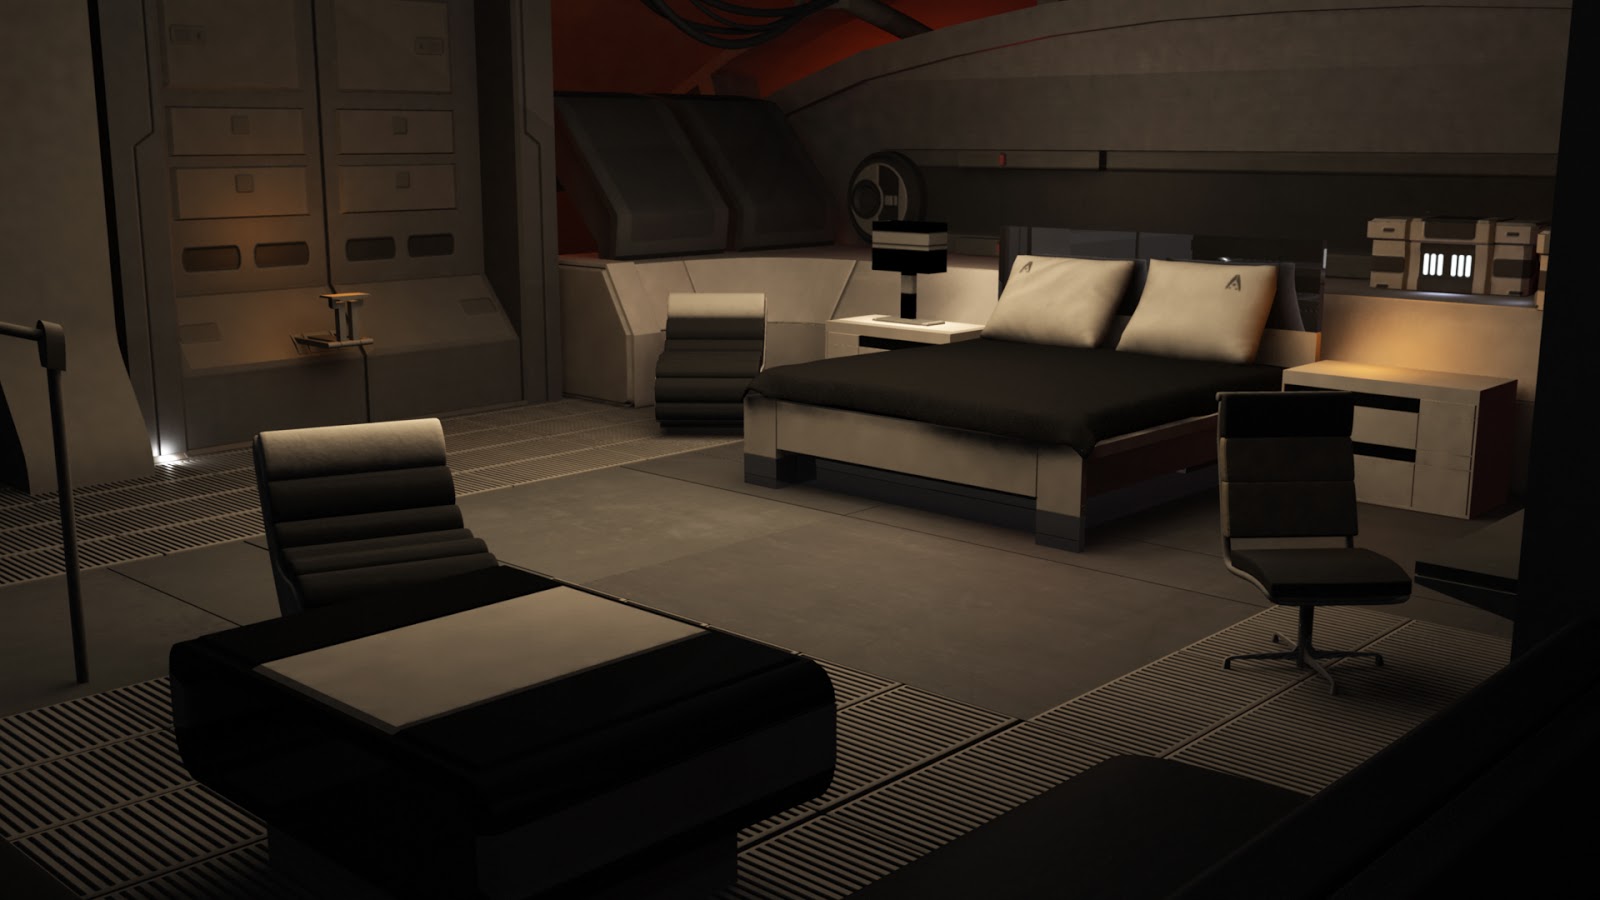
 This is a screenshot test I did to make sure that the art style is headed in a cohesive direction and that the characters and backgrounds will be different enough that the characters will "pop". Please feel free to comment and critique.

Simple BG sketch from a while back

We actually had a slide show of sketch's and concept stuff but I gotta save some for down the road


Sunday, January 20, 2013

Ian Mckellen or Bust

We had some free time to experiment with zbrush so I took a base mesh I had made a while ago in Maya and popped it into zbrush to see what would happen. I've always enjoyed detail work so I had a great time carving out the wrinkles and folds. The next thing I intend to do is paint him up and try out fiber mesh for his hair. The helmet you see here was really just a place holder so I could check myself as I worked to see if the overall shape was working ok.

Sunday, January 6, 2013

Barbarian Base Mesh

This is the base mesh for an original character I've been working on in class right now. The body was built in Maya and the head I sculpted in zbrush and then retopologized. Next I'll bring the whole character into zbrush and do all the detail work including adding the his accessories and weapons! I've used Maya quite a bit before but this was my first real attempt at any zbrush work, and it is an amazing application. I found I was able to relax and forget about the engineering aspect of building a character and let myself just sink into the art.
This is the sculpt from zbrush. There's a lot of detail in this first pass that you can't see in the retopologized version up top so I thought I'd include this as well.